In this section you'll find information about:
Welcome screen
Creating a new Safe
Opening a safe
Using a safe
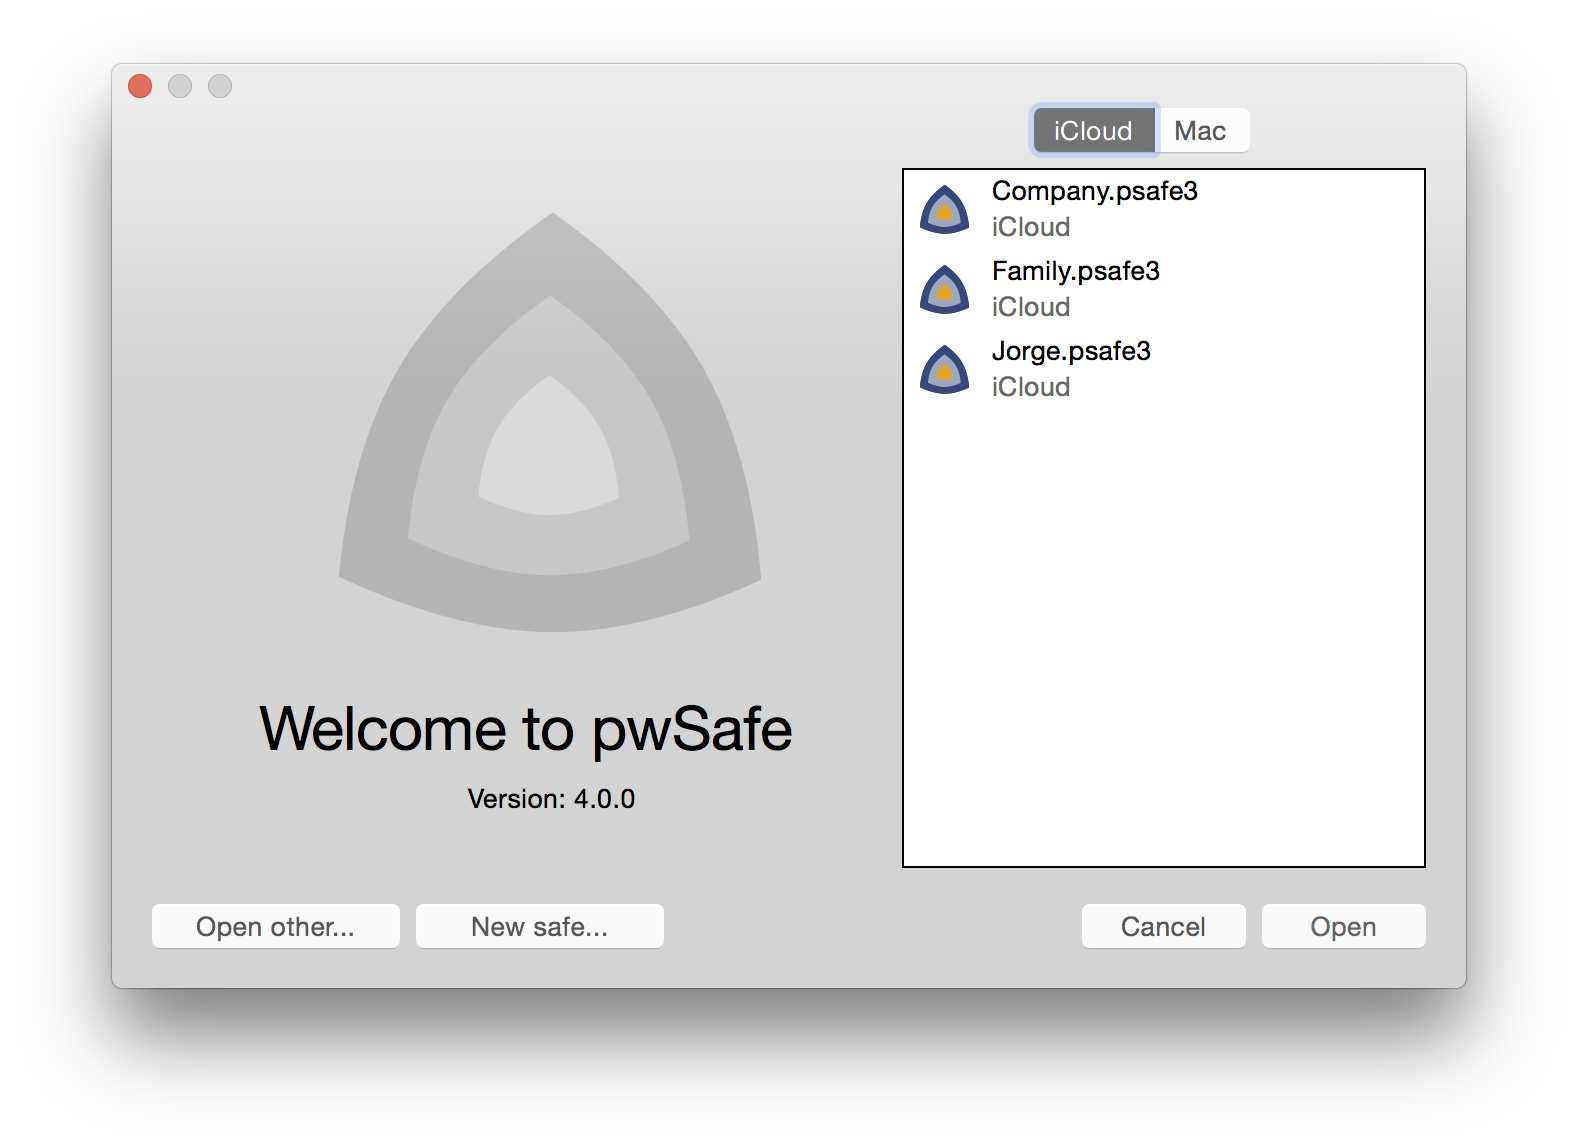
When you start pwSafe, you be shown the Welcome Screen. From this window you can open and create documents. Whenever you need to come back to it, just use the 'Window' menu and choose the 'Welcome to pwSafe' option.
To create a new safe click the "New safe..." button on the Welcome Screen or choose the 'New' option on the 'File' menu. Once either path is chosen, a new safe will be created and you will be asked to create a new password for it:
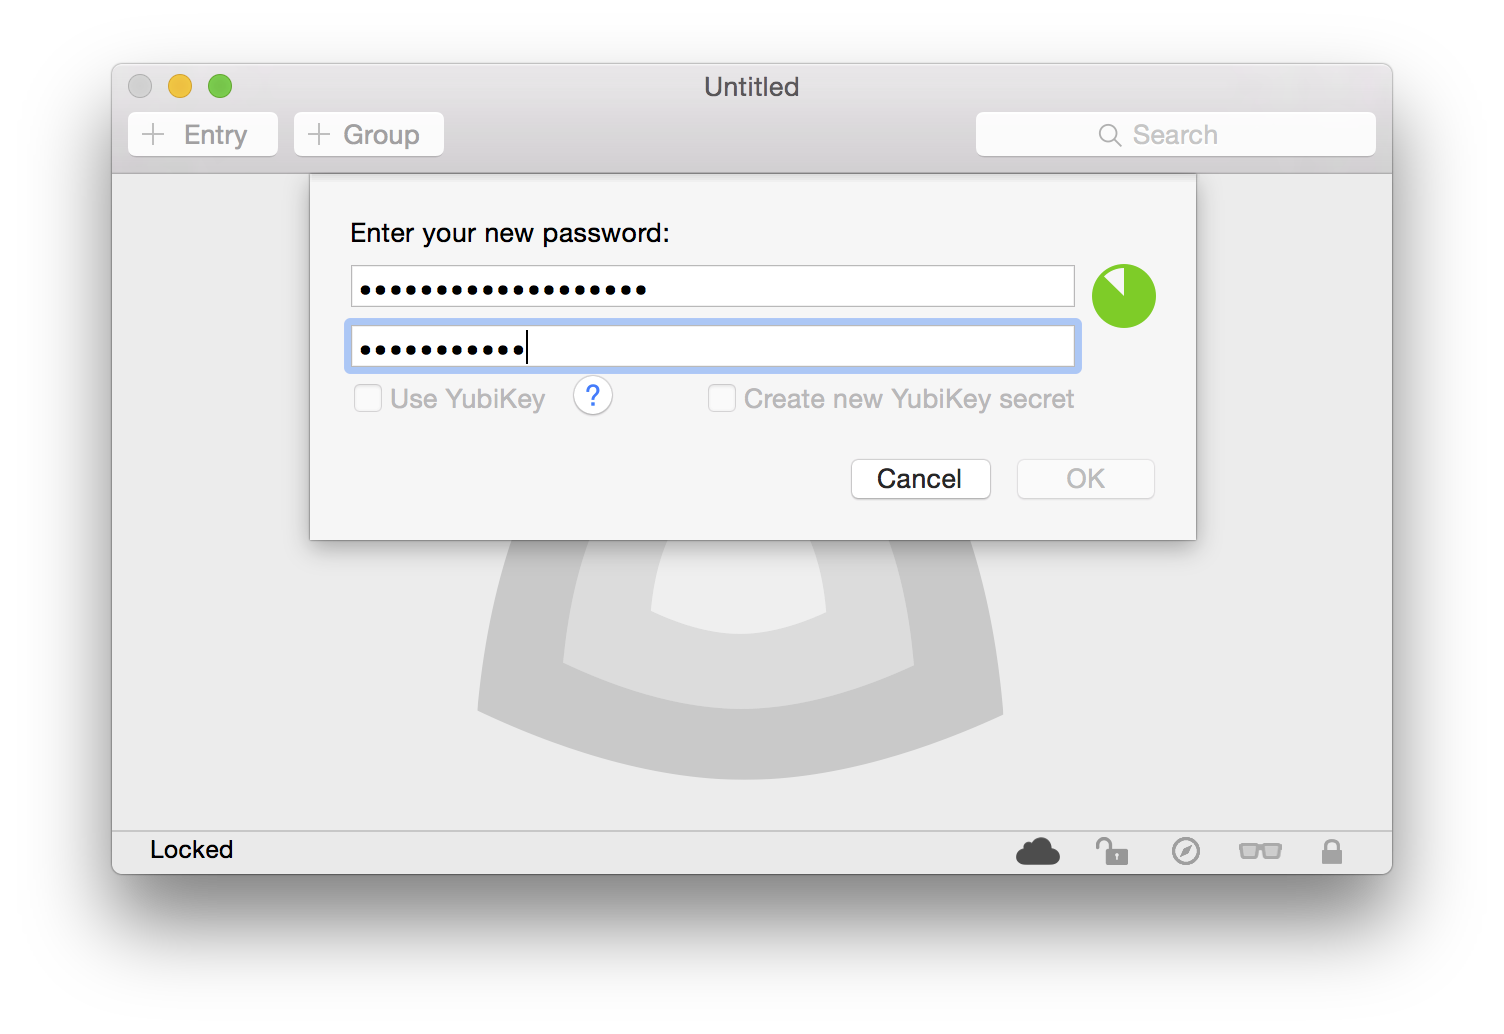
Please mind the password strength indicator to the right. The fuller and greener it is, the stronger your password or passphrase is (a full indicator means your password has around 128 bits of entropy).
Once your safe password is set,the safe will be opened and pwSafe will automatically create a new entry for you.
At any time, save your password by pressing Command-S or using the 'File' - 'Save' menu option. When you do, you'll be asked for a safe name and folder.
All saves are created locally on your Mac. After saving a new safe, it can be moved to iCloud by choosing the 'File' - 'Move to ...' menu option (please see instructions on troubleshooting iCloud configuration if this option is not enabled).
From the Welcome Screen, select the safe you wish to open, either on your Mac or on iCloud, and click "Open". You'll be prompted for the safe's password:
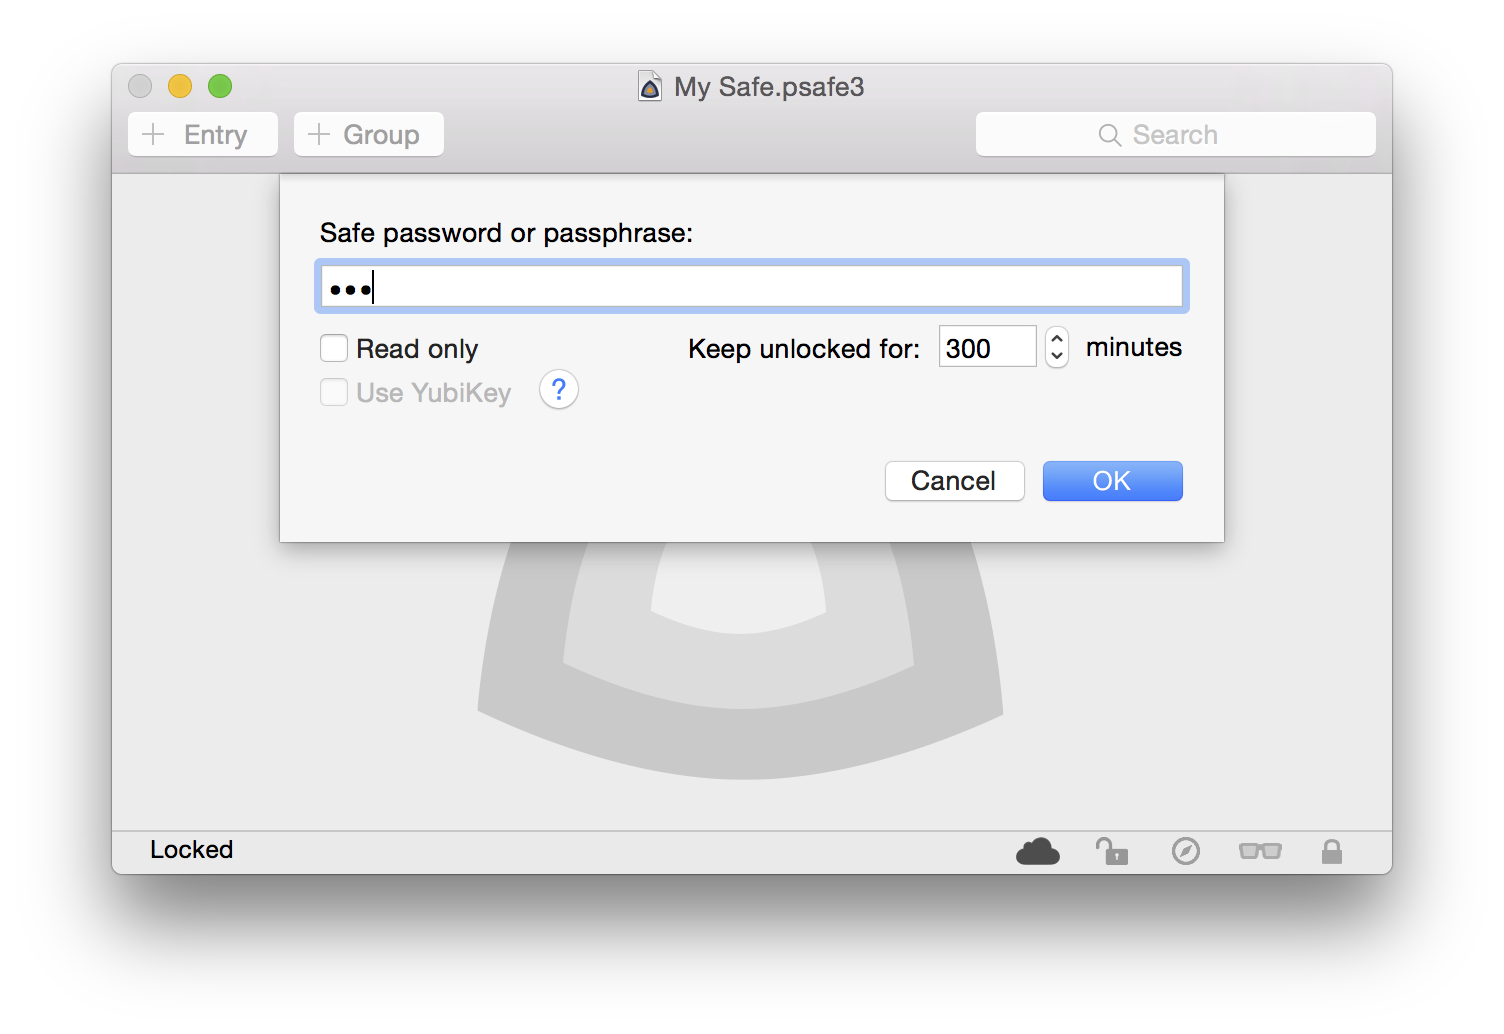
Enter the same password you used when creating the safe.
On this screen you can also define the amount of idle time before pwSafe auto-locks your safe for security purposes. At any time, the safe can be manually locked by selecting the 'Safe' - 'Lock' menu option, or pressing Command + L.
The most common way of using pwSafe is by copying information about one entry to the pasteboard. Once the information is copied, it can be pasted on other apps such as the web browser.
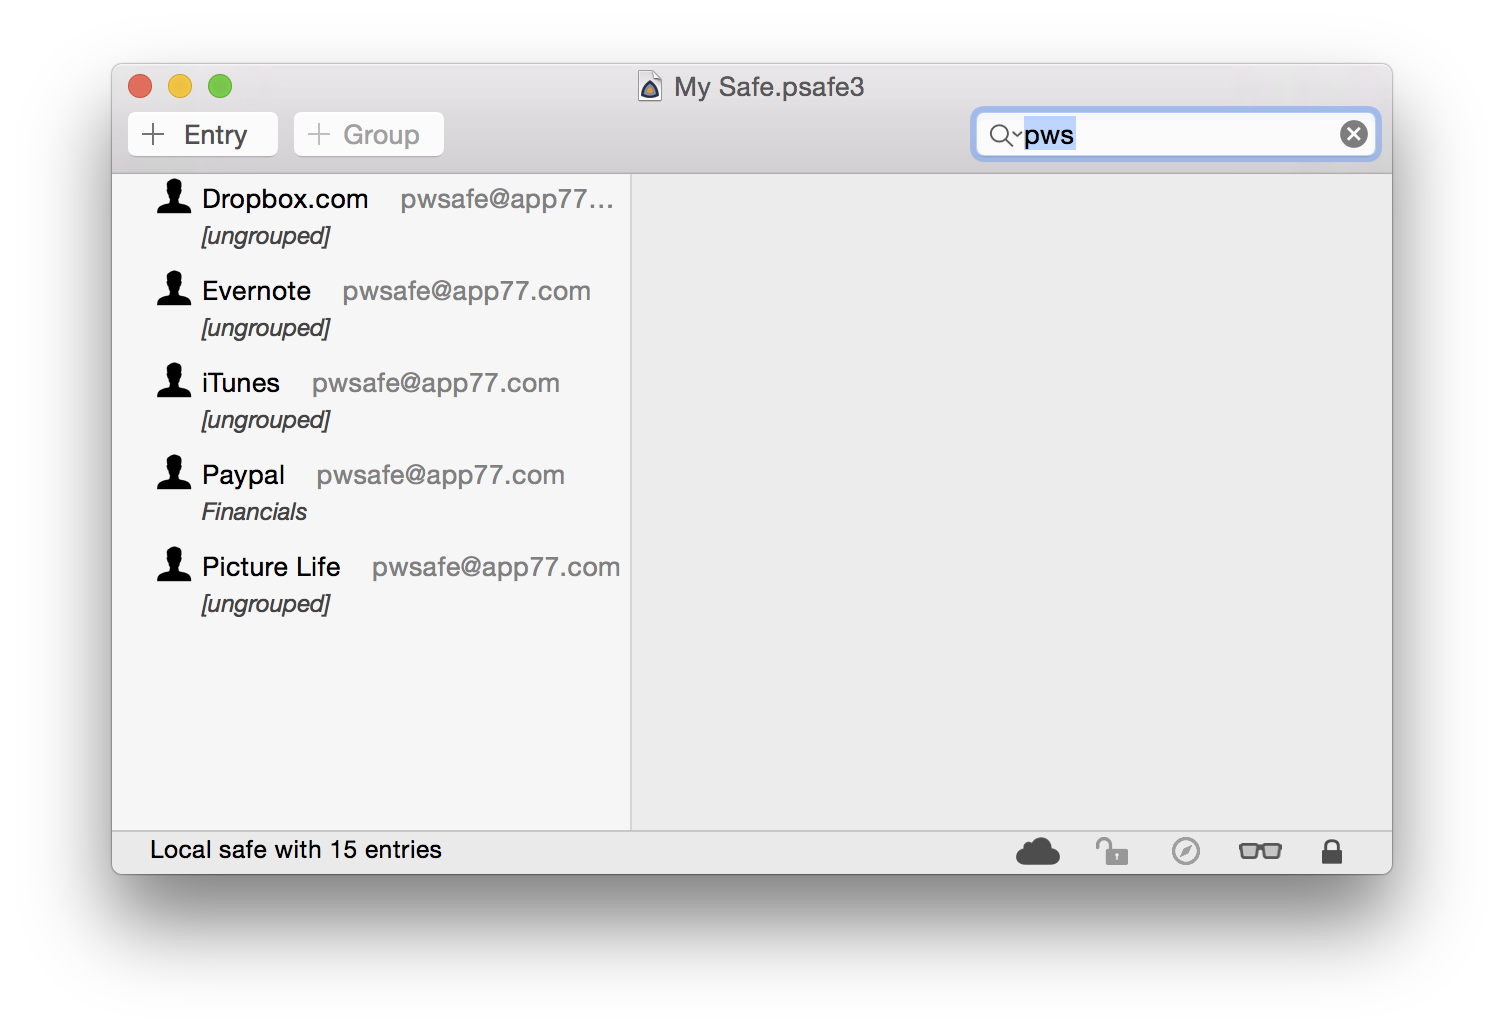
To find the entry you are looking for, either browse the left panel or press Command-F and search for it. You can search just the title or all entries details:
To copy an entry's password to the pasteboard, double-click it. To copy other information to the pasteboard, Command-click (or right-click) it and chose the relevant option from the popover menu. When you do either operation, a small notification window will be show. You can configure this notification window using the System Preferences's Notifications section.
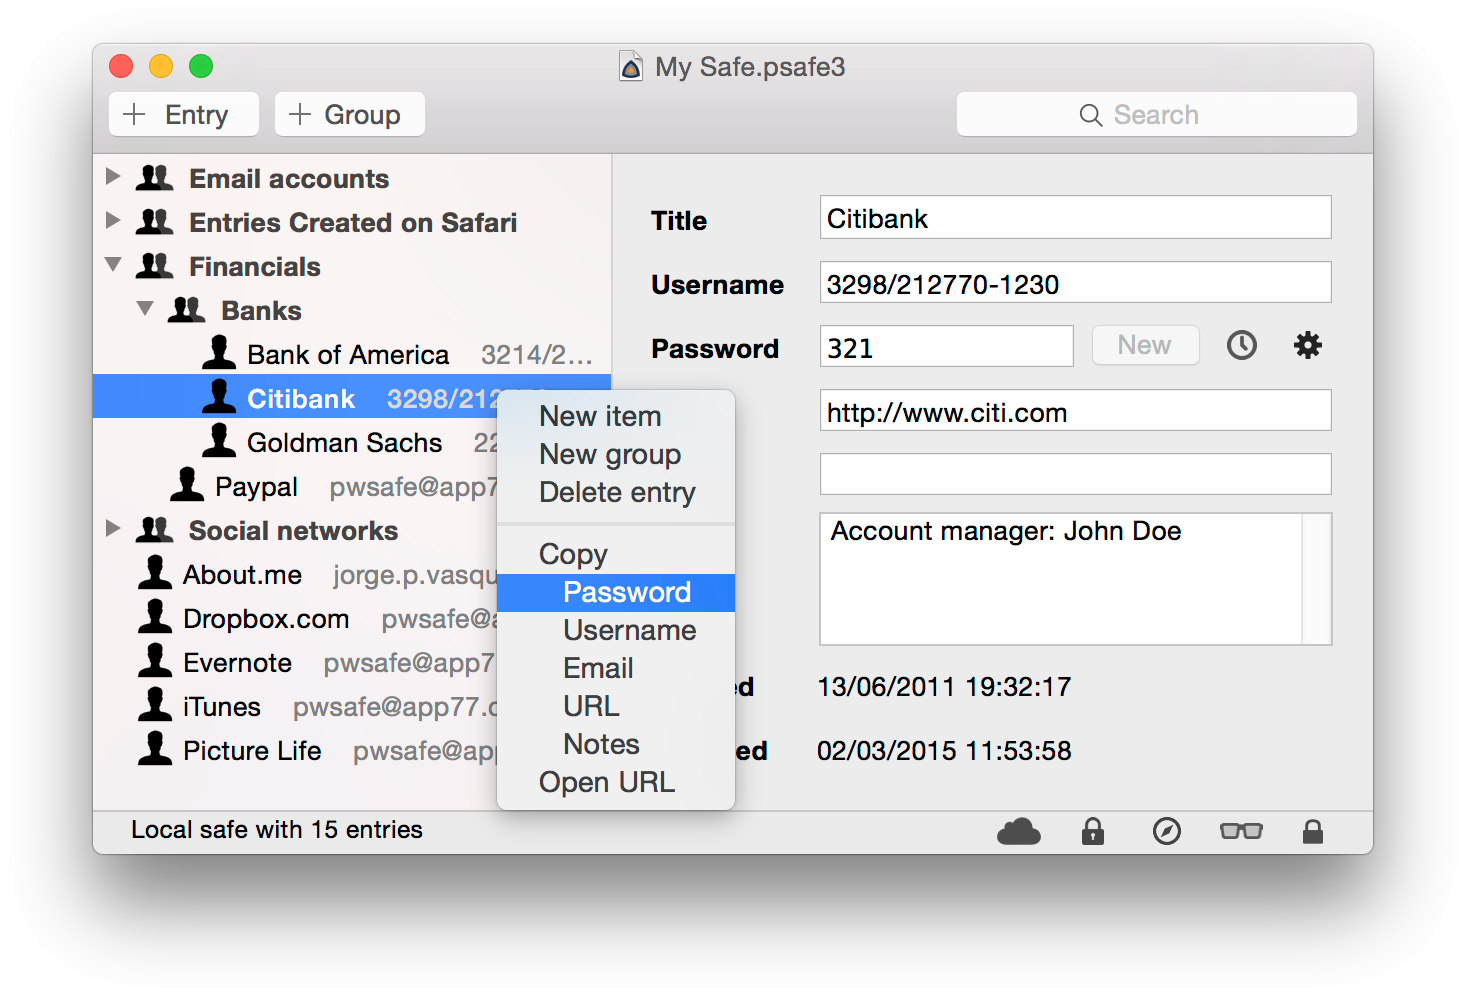
There's also a shortcut for opening the entry's URL and copying its password to the clipboard in a single operation. Just click the button with the compass symbol or press Command + Option + S on your keyboard.
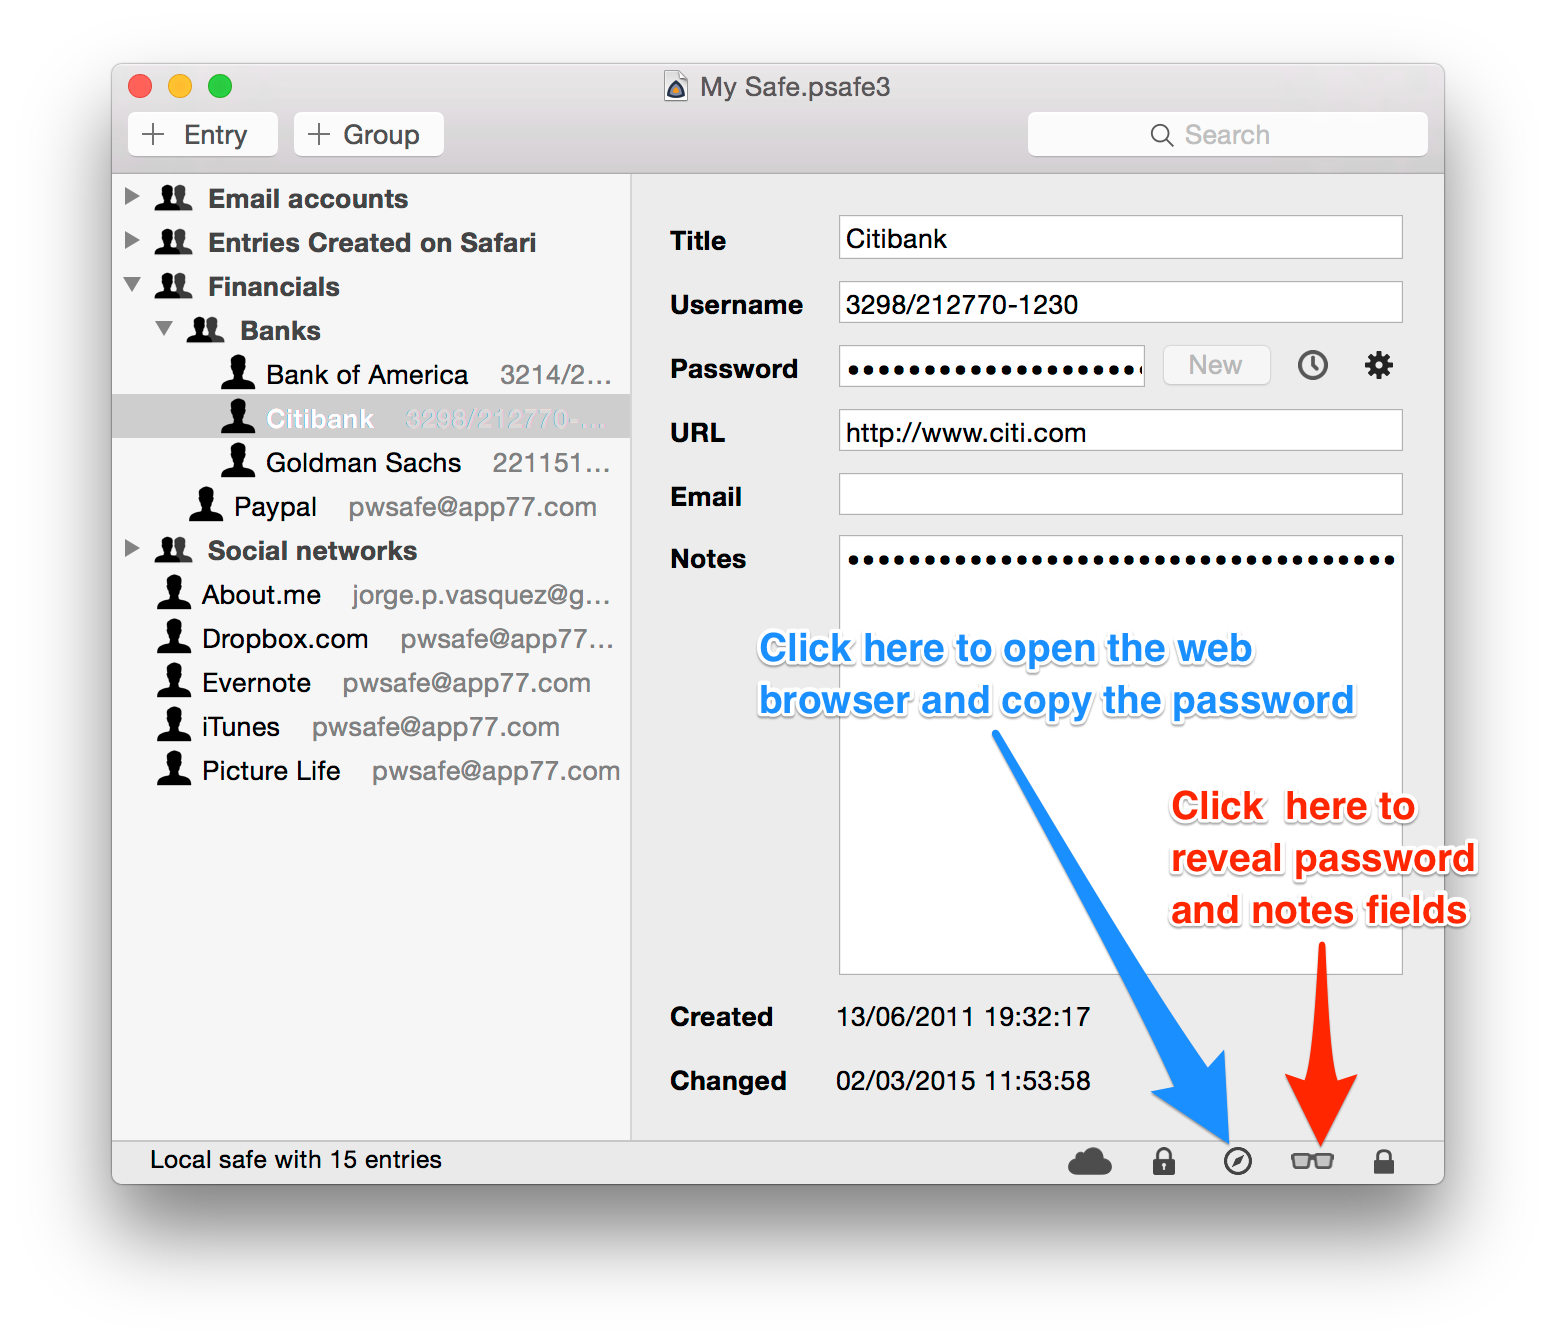
You can also view the hidden details by clicking the sunglasses on the toolbar or using the 'View' - 'Show hidden fields' menu option. On the preferences screen, you'll also find an option to always show the password and or the notes fields.
A couple of minutes after copying a password, if it is still on the pasteboard, pwSafe will clear it to protect your privacy. Both this timer interval and this behavior are configurable on the preferences screen.
You can also install extensions on your web browser, which communicate with pwSafe to automatically fill login fields whenever needed. Go to our extensions webpage to install an extension in your browser.